By MetaverseWatcher Staff. Updated November 11, 2026. Steps checked against Meta Quest Help the same day.
A new Meta Quest 3 or Quest 3S is one of the most common holiday upgrades, and the first question most Quest 2 owners ask is simple: will I lose my games? The short answer is NO. Your purchases belong to your Meta account, not to the headset. Your save files are a different story, and that is where most people lose hours of progress. This guide walks through exactly what moves on its own, what needs one setting changed first, and what you have to copy by hand, in the order that keeps everything safe.
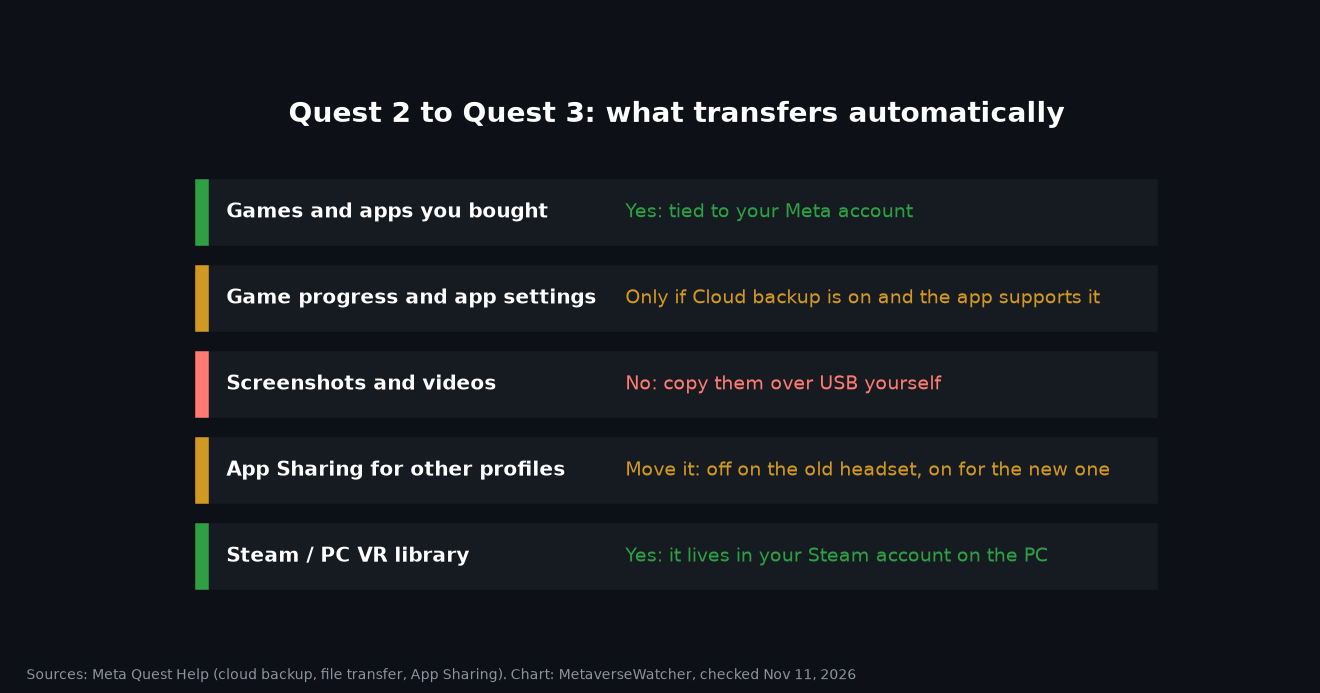
The short version
- On the old Quest 2, turn on Cloud backup and let it sync on Wi-Fi.
- Check which of your games actually support cloud backup at secure.oculus.com/my/cloud-backup.
- Copy screenshots and videos to a computer over USB.
- Set up the Quest 3 with the SAME Meta account and pair it in the Meta Horizon phone app.
- Reinstall games from your App library, then open each important game and confirm the save came back.
- Move App Sharing if other people use your headset.
- Only then factory reset the Quest 2 before you sell or gift it.
What transfers and what does not
| Item | Moves automatically? | What you need to do |
|---|---|---|
| Games and apps bought on the Meta Horizon Store | Yes | Sign in with the same Meta account and download them again from App library. |
| Game progress and app settings | Only if supported | Turn on Cloud backup before you switch. Developers decide whether their app uses it. |
| Screenshots and recorded videos | No | Copy them to a computer over USB, then to the new headset if you want them there. |
| Sideloaded apps and their data | No | Reinstall them on the new headset. They are not part of your Store library. |
| App Sharing for other profiles | No | Turn it off on the old headset and on for the new one. It works on one headset at a time. |
| SteamVR and PC VR games | Yes | They live in your Steam account on the PC. Just connect the new headset with Link, Air Link or Steam Link. |
Step 1: Turn on cloud backup on your Quest 2
According to Meta’s cloud backup help page, cloud backup saves an app’s progress and settings so you can pick up where you left off when you reinstall an app, factory reset the headset, or set up a new Meta Quest. To turn it on:
- Press the Meta button on your right controller to open the Navigator.
- Select Quick controls, then Settings, then General.
- Select Cloud backup and make sure the toggle is on.
Leave the headset charged and on Wi-Fi for a while so the backup can finish. The key caveat is in Meta’s own wording: cloud backup is available to every developer, but “it’s up to developers to decide whether to enable this feature for their app and what data is backed up.” In practice, that means you should not assume every game is covered.
Step 2: Check which games are actually backed up
On a computer, open secure.oculus.com/my/cloud-backup. Meta’s page lists which of your downloaded apps support cloud backup, plus the LAST backup time and backup size. Search for the games you care about most. If a game is missing from the list, or its last backup is weeks old, do not wipe your Quest 2 yet. Some games keep progress in their own online accounts instead, so check the game’s settings or support page before you assume the save is gone.
If you use end-to-end encrypted backups
Quest 2 and later headsets can protect cloud backups with end-to-end encryption and a 6-digit PIN. Write that PIN down. Meta is blunt about the risk: if you forget it and have not set up a recovery device, “Meta can’t reset your end-to-end encryption PIN or restore your backup for you.” Meta also notes that entering the PIN incorrectly 10 times in a row deletes your cloud backups. This PIN is separate from your Store PIN.
Step 3: Copy your screenshots and videos
Captures stored on the headset do not follow your account. Meta’s file transfer help page describes the manual route: connect the Quest 2 to a computer with a data-capable USB-C cable, put the headset on and select Allow when it asks about file access, then copy the files off. On Windows the headset shows up like a drive; on a Mac you will need a file transfer utility. If you have not saved captures before, our guide to taking screenshots and recording video on Quest 3 shows where they are stored.
Step 4: Set up the Quest 3 with the same Meta account
Charge the new headset, turn it on and follow the in-headset steps for fit, Wi-Fi and updates. Then pair it with the Meta Horizon app on your phone, signed in to the account you used on the Quest 2. This is the single most important detail in the whole process: a different account means an empty library. Our Meta Quest 3 setup guide covers the first boot, boundary and controller pairing in detail.
If you are still deciding which headset to buy, our Quest 3 vs Quest 3S comparison breaks down the lens, display and price differences. Both run the same Store library, so everything in this guide applies to either one.
Step 5: Reinstall your games and confirm your saves
Open the Navigator, select App library, and select any game that is not installed to download it again. You can also queue installs from the Meta Horizon phone app so they download while you finish setup. When a supported game installs, its cloud save restores. If you use encrypted backups, enter your PIN when prompted.
Before moving on, open each game you care about and confirm that your level, unlocks or high scores are there. Then make sure Cloud backup is switched on in the Quest 3’s Settings > General as well, so future progress is protected. Quest 3 has more storage headroom on the 512GB model, but if you are on 128GB, our guide to freeing up storage on Quest 3 helps you avoid reinstalling everything at once.
Step 6: Move App Sharing for family profiles
If other people use their own profiles on your headset, App Sharing lets them play the games you bought. According to Meta’s help page on sharing apps on a different Meta Quest, App Sharing can be on for only ONE headset at a time. Turn it off in the Quest 2’s profile settings, then turn it on in the Quest 3. Our explainer on Meta Quest profiles and App Sharing explains how the owner account and additional profiles work.
Step 7: Factory reset the old Quest 2
Do this last, and only after your saves and files are confirmed on the new headset. A factory reset erases everything stored on the headset, including your account sign-in, so it is the right step before you sell or hand down a Quest 2. It does not remove purchases from your account. Our factory reset guide covers both the phone app method and the button method. If you are passing the Quest 2 to a family member as a gift, our guide on how to gift a Meta Quest game is a useful next step for setting them up with their own library.
What about PC VR and Steam games?
If you play PC VR through Link, Air Link or Steam, nothing about those games lives on the Quest. Your SteamVR library, settings and Steam Cloud saves stay with your Steam account on the PC. Connect the Quest 3 the same way you connected the Quest 2 and they will be waiting. Our guide to playing PC VR games on Quest 3 covers the cable and wireless options.
Common problems
- My library looks empty. You are almost certainly signed in to a different account or profile than the one that bought the games. Sign out and sign in with the purchasing account.
- A game started from level one. Check the cloud backup page. If the game does not support cloud backup and you have already reset the Quest 2, that progress cannot be recovered through Meta.
- A game I bought will not install. Confirm the title supports Quest 3. Nearly the entire Quest 2 catalog does, but if a purchase misbehaves, our guide to Meta Quest refunds explains your options.
- My new headset has a fault. Keep the Quest 2 intact until you are sure the new unit works. Our Quest 3 warranty and repair guide covers what Meta replaces.
Bottom line
Your Meta Quest purchases are safe the moment you sign in with the same account. The real risk in a Quest 2 to Quest 3 upgrade is game progress, and it is entirely avoidable: turn on cloud backup, check the backup list, confirm your saves on the new headset, and reset the old one LAST. Spend ten minutes on those checks and you will not lose a thing.