Updated November 18, 2026. Instructions are based on Meta’s current Quest Help pages and Meta’s own guide to vision correction for Quest 3 and 3S.
Yes, you can wear glasses with a Meta Quest 3 or Quest 3S. Most people who wear glasses do not need to buy anything. The catch is that each headset handles glasses differently. Quest 3 uses built-in eye-relief buttons to move the lenses farther from your face, and Quest 3S ships with a removable glasses spacer. Both have the same frame-size limit, and getting the fit wrong is the most common way people scratch the headset lenses or their own glasses.
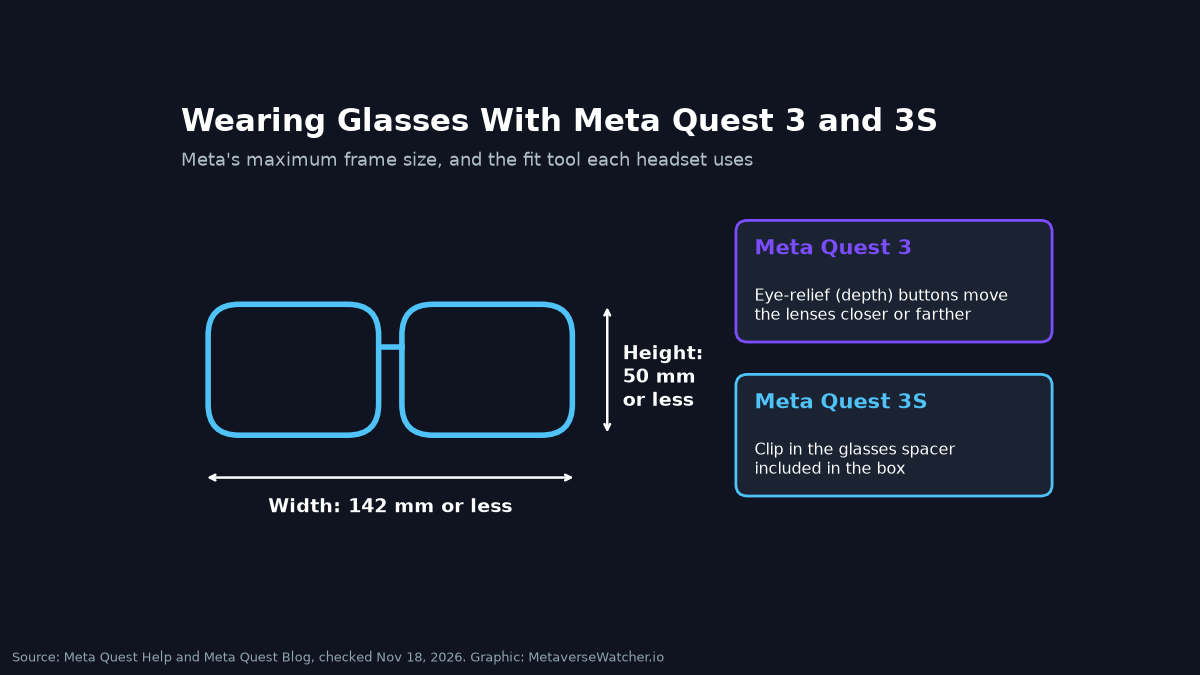
Quick answer
| Meta Quest 3 | Meta Quest 3S | |
|---|---|---|
| Can you wear glasses? | Yes | Yes |
| Maximum frame size (Meta) | 142 mm wide, 50 mm tall | 142 mm wide, 50 mm tall |
| How to make room | Eye-relief (depth) buttons | Included glasses spacer |
| Lens spacing (IPD) | Adjustment wheel, bottom left | Shift lenses by hand until they click |
| Prescription inserts | Zenni (Meta partner), Quest 3 version | Zenni, Quest 3S / Quest 2 version |
Step 1: Check that your frames fit
Meta’s help page sets a clear limit: frames should be 142 mm or less wide and 50 mm or less tall. To check, measure the front of your glasses across the widest point, hinge to hinge, then measure the tallest lens from top to bottom, including the rim. Many frames list their lens width, bridge and temple length on the inside of an arm. Those printed numbers are not the same as total frame width, so use a ruler.
If your frames are bigger, Meta suggests third-party glasses spacers or prescription lens inserts instead. Very wide, tall or heavily curved frames are the ones most likely to press on the headset lenses.
Step 2 (Quest 3): Use the eye-relief buttons
Quest 3 has a depth adjustment built in, so it does not need a spacer. Meta’s setup guide describes the process this way:
- Take the headset off and gently tilt the headset arms upward.
- Find the eye-relief buttons beside the lenses, inside the facial interface.
- Hold down the button on one side while holding the edge of the interface, and slide the interface forward or backward to change the distance.
- Repeat on the other side so both sides are at the same setting.
For glasses, move the lenses farther from your face. Then try the headset on. If your frames still touch the lenses, add more distance. Keep in mind that more distance usually means a slightly narrower field of view, so use the closest setting that keeps your glasses clear of the optics.
Step 2 (Quest 3S): Install the glasses spacer
Meta’s blog says the glasses spacer is included in the Quest 3S box. Meta’s help page gives three steps to install it:
- Gently remove the facial interface from the headset.
- Press the glasses spacer into place where the facial interface was.
- Re-attach the facial interface on top of the spacer.
Keep the spacer somewhere safe when you take it out. If someone else in the house uses the headset without glasses, they will usually get a wider view without it.
Step 3: Put it on front to back
Meta’s guidance is specific here, and it matters. When you wear glasses, put the headset on front to back: bring it to your face first, then pull the strap over the back of your head. To take it off, pull it forward and away from your face before lifting it. Doing it in that order keeps the headset from dragging down across your frames, which can scratch both sets of lenses.
After that, loosen the back and top straps, set the headset comfortably on your face, then tighten the split rear strap and adjust the top strap to take weight off your nose and cheeks. Meta also suggests tilting the headset up or down on its arms to improve comfort.
Step 4: Set your lens spacing
Glasses do not change your eyes’ spacing, but a blurry image is easy to blame on your frames when the real problem is lens spacing (IPD). On Quest 3, turn the wheel on the bottom left of the headset until text looks sharp. On Quest 3S, grab the outer edge of a lens and slide it left or right until it clicks into the clearest position. For the full walkthrough and how to measure your IPD, see our guide on how to adjust IPD on Quest 3 and 3S. Our best Quest 3 settings for clarity and comfort covers the next round of tweaks.
Protecting your lenses (and your glasses)
- Make sure nothing touches. Meta warns that headset lenses and glasses can scratch each other. If you feel any contact, add more eye relief (Quest 3) or check the spacer is fully seated (Quest 3S).
- Clean with a dry microfiber cloth only. Meta says to use a dry optical microfiber cloth on the lenses, with no liquid or chemical cleaners. Our guide to cleaning Quest 3 lenses covers this in detail.
- Keep the headset out of direct sunlight. Meta notes that sunlight through the lenses can permanently damage the display, so do not leave it near a window.
- Clean or replace damaged glasses. Meta’s blog notes that crooked frames or scratched lenses on your own glasses can make the picture worse.
Troubleshooting
The image is blurry at the edges. Try lowering the headset slightly on your face or changing its tilt, then readjust lens spacing. If you have added a lot of eye relief, part of the blur may come from sitting farther from the optics, which is a trade-off of wearing frames.
My glasses press into my nose. Loosen the rear strap and tighten the top strap so the weight sits on your head, not on your frames. If the pressure stays, your frames may be too tall or curved for comfortable use.
My glasses or lenses fog up. Fogging is common in active games. Meta’s partner Zenni offers an optional anti-fog coating on its prescription inserts, which is one reason regular players switch to inserts. Taking a short break also helps. If you also feel uneasy during play, our guide to preventing VR motion sickness may help.
When to switch to prescription inserts
Glasses work for casual sessions. Inserts are the better long-term fix if your frames are larger than 142 x 50 mm, you play active or fitness games, or several people share the headset and you are tired of moving the spacer. Meta’s partner is Zenni, which sells separate versions for Quest 3 and for Quest 3S / Quest 2. According to Meta, the L and R markings sit at the bottom on Quest 3 inserts and at the top on the Quest 3S / Quest 2 version, and the inserts push onto the headset lenses until they snap into place. Meta also lists contact lenses as an option. For prices and prescription ranges across headsets, see our VR prescription lens inserts guide.
Bottom line
Measure your frames first. If they are within 142 x 50 mm, Quest 3 owners only need the eye-relief buttons and Quest 3S owners need the spacer that came in the box. Put the headset on front to back, take it off by pulling forward, and keep a microfiber cloth nearby. If you are still deciding which headset to buy, our Quest 3 vs Quest 3S buying guide compares the two, and our Quest 3 setup guide covers the rest of the first-day setup.
Sources: Meta Quest Help: How to Wear Glasses While Using Meta Quest; Meta Quest Help: How to set up your Meta Quest 3; Meta Quest Blog: Vision Correction in Mixed Reality.